

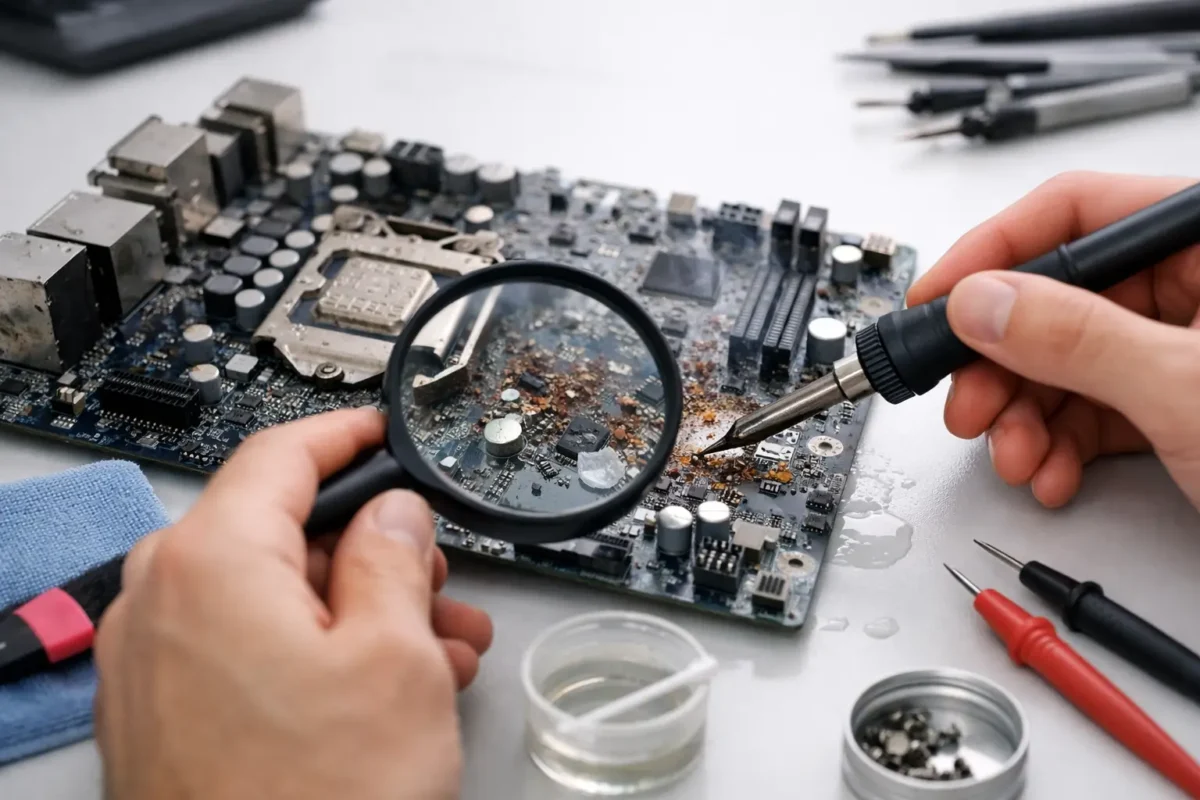
A motherboard can look dry and still be actively failing. Liquid leaves behind minerals, sugars, acids, and conductive residue that continue corroding traces and components long after the spill. Knowing how to repair water damaged motherboard problems starts with one rule: stop electricity before corrosion turns a recoverable accident into permanent board damage.
Whether the device is a gaming laptop, desktop PC, console, DJ controller, or business workstation, the first few minutes matter. A proper repair is not just drying the board, replacing a battery, or hoping it powers on. It is a controlled process of isolating power, removing contamination, inspecting the PCB, and diagnosing every affected circuit.
First: Stop Power and Prevent More Damage
If the device is running when liquid hits it, shut it down immediately. Hold the power button only long enough to force it off if necessary, then disconnect the charger, power cable, USB devices, Ethernet, display cables, and accessories. Do not test it again to see whether it still works.
For a laptop, remove the external battery if the model allows it. Then open the bottom cover and disconnect the internal battery from the motherboard as soon as practical. For a desktop, switch off the power supply, unplug it from the wall, and remove the CMOS battery after the system is fully disconnected. Consoles and professional audio equipment should also remain unplugged until they are inspected.
Do not charge a wet device. Do not press its power button repeatedly. Current passing through liquid residue can create shorts, burn tiny power-management components, and damage data-critical storage circuits. The damage caused by the spill may be limited. The damage caused by repeated power attempts often is not.
Do Not Use Rice, a Hair Dryer, or a Heat Gun
Rice does not remove corrosion or contamination. It may absorb a small amount of surface moisture, but it cannot clean under ICs, connectors, shielding, or dense BGA chips. It can also leave dust and debris inside ports and fans.
A hair dryer is equally unreliable. High heat can warp plastic connectors, soften adhesives, drive residue farther under components, or damage sensitive parts before the board is actually dry. A heat gun is worse in untrained hands because it can dislodge small components or weaken solder joints.
Air drying has a place after cleaning, but drying alone is not repair. If the liquid was coffee, soda, sports drink, saltwater, or anything other than clean distilled water, expect residue to remain on the board even after every visible drop disappears.
Assess the Spill Before You Clean
The type of liquid and how long it sat on the motherboard help determine the repair path. Distilled water is less aggressive than tap water, but it can still carry contaminants from the case and components. Coffee, soda, juice, alcohol mixers, and energy drinks are more serious because sugars and acids leave conductive deposits. Saltwater is especially destructive and requires immediate professional attention.
Look for obvious trouble spots around the charging circuit, battery connector, keyboard area, display connector, USB ports, audio jacks, and power supply section. On desktops, inspect the motherboard near the lower edge of the case, graphics card slot, RAM slots, and front-panel connectors. On consoles and DJ gear, liquid often reaches boards through top vents, faders, jog wheels, buttons, or port openings.
Take clear photos before removing cables, screws, heatsinks, or shields. This is more than a convenience. Many devices use similar-looking screws of different lengths, and putting one in the wrong location can puncture a board or display assembly during reassembly.
How to Clean a Water Damaged Motherboard
For accessible surface contamination, the safest cleaning material is high-purity isopropyl alcohol, ideally 90% or higher, along with a soft anti-static brush. Lower-purity alcohol contains more water and is less effective at displacing moisture and lifting residue. Use lint-free wipes for surrounding surfaces, but avoid dragging fibers across fine-pitch components.
Disconnect the battery first. Then carefully remove loose residue with the brush and isopropyl alcohol. Work around connectors, coils, capacitors, chips, and solder joints without forcing bristles under components. If corrosion is visible, clean until the affected area no longer shows white, green, blue, or sticky deposits.
Pay special attention to:
- Battery and charging connectors
- USB-C, HDMI, headphone, and other I/O ports
- Keyboard and trackpad connectors on laptops
- Power-management ICs and nearby capacitors
- Areas under shields, heat pipes, and cooling assemblies
After cleaning, allow the board to dry fully in a clean, low-humidity area. A fan can help move air across the board, but do not rush the process by baking it in an oven or applying uncontrolled heat. Before reconnecting power, inspect again under strong light or magnification. Any remaining green or white corrosion deserves more cleaning and closer diagnosis.
Why Visible Cleaning Is Often Not Enough
Modern motherboards pack power rails, data lines, and microscopic components into a small area. Liquid can travel under a connector, beneath a QFN chip, or under a BGA processor where a brush cannot reach. Corrosion may also eat through a trace without leaving dramatic surface evidence.
That is why a device can seem fine after drying, then fail days or weeks later. It may boot but refuse to charge. It may power on with no display, lose USB functionality, overheat, cycle on and off, or show intermittent keyboard and audio failures. Those symptoms point to a circuit-level problem, not a simple moisture issue.
Professional diagnosis involves checking for shorted rails, measuring resistance to ground, tracing power sequencing, testing charging circuits, and inspecting affected areas under magnification. Depending on the board, the repair may require connector replacement, trace repair, capacitor replacement, corrosion cleanup under shields, micro-soldering, or BGA-level work. The right repair depends on what the measurements show, not what looks damaged at first glance.
Know When to Stop the DIY Attempt
Basic cleaning can be reasonable if the spill was minor, power was removed immediately, the board is easy to access, and there is no visible corrosion or operational problem after proper cleaning. Even then, proceed carefully and keep the battery disconnected until you are certain the board is dry.
Stop and seek board-level service if the device will not power on, gets hot quickly, has a burning smell, shows corrosion around fine-pitch chips, or contains data you cannot afford to lose. The same applies when liquid reached a laptop keyboard, a console power section, or a DJ controller’s performance controls. These systems often have hidden layers and fragile ribbon connections that are easy to damage during a first-time teardown.
Do not keep replacing parts at random. A new battery, charger, SSD, or power supply will not solve a shorted motherboard rail. Random part swapping adds cost and can hide the real failure. A proper technician isolates the fault before recommending repair or replacement.
Protect Your Data Before Making a Repair Decision
For desktops, the storage drive may be unaffected even when the motherboard has failed. If the drive was not exposed to liquid and can be safely removed, data recovery may be straightforward with the right equipment. Laptops are less predictable because many newer models use soldered SSD storage or route storage power through the damaged board.
If business files, family photos, project sessions, or client data are involved, say so before authorizing work. The repair strategy may change. The first priority can be stabilizing the board long enough to access data rather than restoring every feature immediately.
At Amazing Technology Group, we treat liquid damage as a diagnostic job, not a guesswork job. That means identifying what the liquid reached, what circuits are affected, and whether component-level repair offers a sensible path forward before unnecessary parts are ordered.
Reassemble Carefully and Test in Stages
Once cleaning and repair are complete, reassemble in reverse order using the photos taken during disassembly. Check that every ribbon cable is seated straight, every connector is fully latched, thermal pads are positioned correctly, and thermal paste is renewed if the heatsink was removed. Do not pinch antenna cables or force a connector that does not align naturally.
The first power test should be deliberate. Watch for excessive heat, blinking charge indicators, fan behavior, error codes, and abnormal smells. Test core functions before declaring victory: charging, battery detection, display output, USB ports, Wi-Fi, audio, storage, keyboard or controls, and sustained operation under normal load.
A water damaged motherboard does not always need replacement, but it does need respect. Fast power isolation and correct cleaning can save expensive electronics. When corrosion has reached the board level, skilled diagnosis gives the device its best chance to come back reliable, not merely turn on once.