

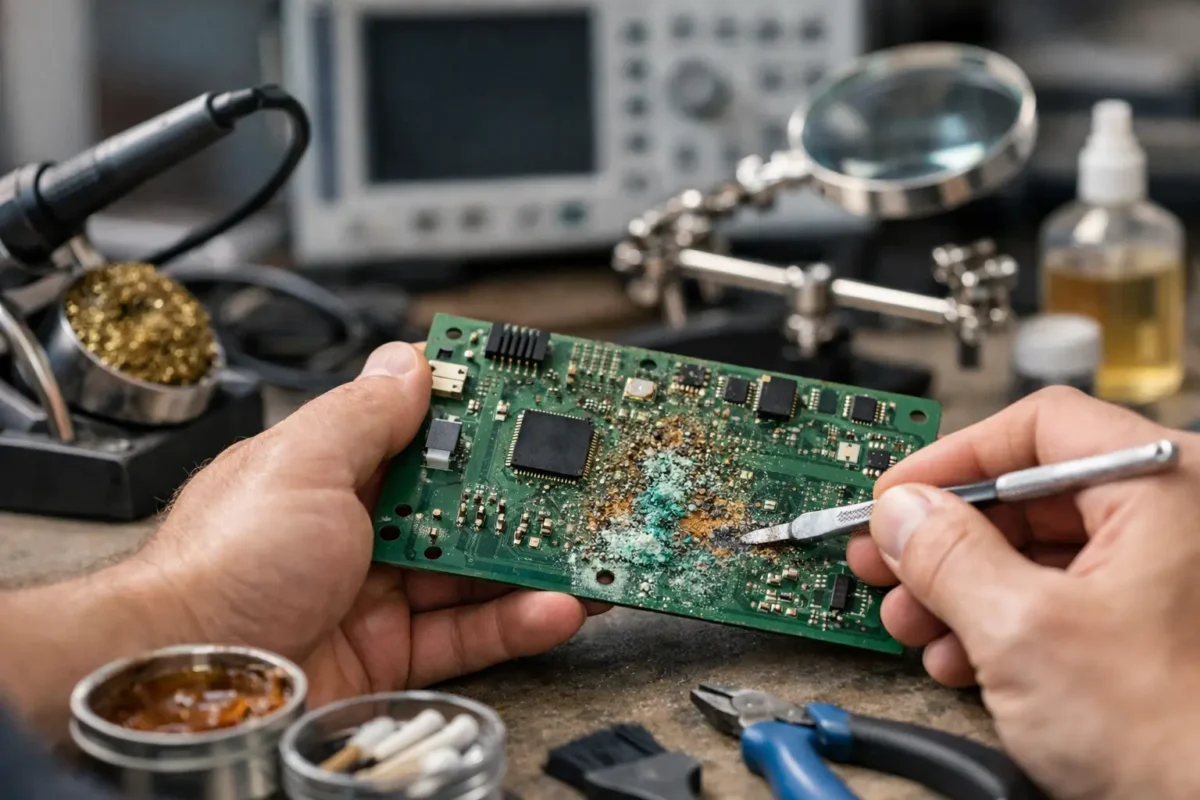
Corrosion on a circuit board rarely looks dramatic at first. A little green around a battery terminal, some white residue near a connector, a device that powers on only when it feels like it. Then the real problems start – intermittent boots, missing audio, dead USB ports, charging failures, and traces that disappear under the damage.
If you want to understand how to repair corroded circuit boards, the first rule is simple: do not treat corrosion like surface dirt. Corrosion is an electrical and chemical failure. If you clean only what you can see and skip the damaged pads, traces, or components underneath, the board may come back for a day, a week, or not at all.
What corrosion actually does to a board
Corrosion forms when moisture, battery leakage, contaminants, or spilled liquids react with metal on the PCB. Copper oxidizes, solder joints weaken, and component legs start to break down. On some boards, especially tightly packed laptop, console, and DJ equipment boards, corrosion also creeps under ICs and connectors where the damage is not visible without magnification.
That matters because the symptom you notice is often not the true failure point. A dead power rail may start at a corroded via three inches away. A charging issue may come from a damaged sense resistor, not the charging port itself. This is why real board repair starts with inspection and testing, not random scrubbing.
How to repair corroded circuit boards safely
Before touching the board, disconnect all power sources. Remove the battery if possible, unplug the adapter, and discharge any stored power. If the board came from a liquid-damaged device, do not keep trying to power it on to “test” whether it still works. Repeated power attempts can turn a repairable corrosion issue into shorted components and burned traces.
Set up a clean work area with good lighting. At minimum, you want nitrile gloves, ESD protection, a soft anti-static brush, high-purity isopropyl alcohol, lint-free swabs, tweezers, magnification, and a multimeter. For advanced repairs, hot air, micro-soldering tools, jumper wire, UV mask, and trace repair materials may also be needed.
The key trade-off here is simple. Light corrosion can sometimes be cleaned and stabilized with basic tools. Structural PCB damage, missing pads, under-chip corrosion, or failed multilayer connections usually need board-level repair equipment and experience.
Step 1: Inspect before you clean
Start with a full visual inspection under magnification. Look for green or blue copper salts, white crusty residue, blackened pads, lifted solder mask, broken component legs, and darkened areas around power circuits. Pay close attention to battery sections, charging areas, connectors, flex cable sockets, and any place where liquid could pool.
Then check both sides of the board. Corrosion often follows vias, edge connectors, shields, and screw holes. On multilayer boards, visible damage may be only the top layer of a deeper problem.
Step 2: Neutralize the source when needed
Not all contamination should be handled the same way. Battery leakage is different from soda, coffee, humidity, or flux residue. Alkaline battery leaks often need careful neutralization before final cleaning. Acidic contamination may need a different approach. If you do not identify the source, you risk spreading residue or leaving active contamination behind.
For most common electronics corrosion cleanup after the source is removed, high-purity isopropyl alcohol is the standard finishing cleaner. It helps dissolve residues and displace moisture, but it does not magically reverse metal loss.
Step 3: Clean the board without tearing it up
Use a soft anti-static brush and isopropyl alcohol to loosen corrosion gently. Work in small sections. Blot and lift residue away rather than grinding it into the board. If pads or traces already look fragile, aggressive brushing can remove what little conductive material is left.
This is where patience matters. A board that looks ugly can still be repairable. A board that gets over-scrubbed can lose reference points, solderable surfaces, and tiny components.
Step 4: Verify the damage after cleaning
Once the residue is removed, inspect the board again under magnification. You are now looking for what the corrosion left behind: eaten traces, pitted pads, cracked solder joints, damaged vias, and components with compromised terminations.
Use a multimeter in continuity mode to check suspicious traces and vias. Measure for shorts on main power rails if the board previously showed no power or unstable behavior. If a connector area was affected, test each pin path back to its next known point in the circuit.
This is where many DIY attempts go off track. The board looks cleaner, so it gets reassembled too soon. A clean board is not the same as a repaired board.
Repairing traces, pads, and components
If corrosion only affected surface grime and left the copper intact, cleaning and reflowing a few joints may be enough. If copper is missing, the repair becomes structural.
Damaged traces can sometimes be rebuilt by scraping back healthy copper, tinning the exposed area, and bridging the gap with fine jumper wire. Missing pads may be repairable depending on what they connected to and how much mechanical stress the part will see. Corroded connectors often need replacement, not just cleaning, because internal pin plating can continue failing after the outside looks fine.
Corroded components are another judgment call. If the legs on a resistor, capacitor, IC, coil, or port show visible degradation, replacement is usually safer than hoping they hold. On high-density boards, especially gaming consoles, laptops, and professional audio hardware, one weak connection can create intermittent faults that waste hours later.
When soldering is enough and when it is not
Fresh solder can restore a weakened joint, but it cannot rebuild missing copper inside a multilayer board. If a via barrel is eaten through or an internal layer connection is compromised, the fix may require micro-jumpers, schematic-level tracing, or a decision that the board is no longer economically repairable.
That “worth repairing” question depends on the device. A high-end motherboard, a scarce console board, or pro DJ gear may justify extensive work. A low-cost consumer board with deep corrosion across multiple power rails may not.
The hidden problem: under-chip and under-shield corrosion
Some of the worst corrosion is not visible from the top. Liquid can wick under BGA chips, metal shields, QFN packages, and fine-pitch ICs. The board may partially work, then fail under heat, load, or vibration. That kind of issue usually cannot be solved with surface cleaning alone.
If the affected area includes major power management ICs, GPU or CPU support circuitry, charging controllers, or high-density signal paths, proper repair may involve component removal, pad inspection, reballing or replacement, and post-repair testing. That is specialized work. It is also why serious board shops keep difficult repairs in-house instead of just replacing assemblies and calling it done.
Common mistakes that ruin repairable boards
The biggest mistake is powering up a wet or contaminated board. Right behind that is using the wrong cleaner, brushing too hard, or assuming all green residue is harmless. Another common problem is replacing obvious parts before confirming the power rail, enable signals, and trace integrity.
There is also the issue of partial repair. A USB-C area may have visible corrosion, but if the charge controller and nearby filters were also affected, changing the port alone will not solve much. Real diagnostics save time because they tell you whether the board has one damaged section or a chain reaction of failures.
When to stop and send it to a board-level repair shop
If the board has fine-pitch components, lifted pads, missing traces, battery acid damage, BGA-area corrosion, or no clear fault after cleaning, it is time to hand it off. The same goes for anything expensive, business-critical, or hard to replace.
A capable shop will inspect the board under magnification, test rail behavior, isolate failed sections, and repair what is actually damaged instead of guessing. For customers in Riverside County dealing with valuable computers, consoles, or specialty electronics, Amazing Technology Group handles this kind of board-level work the right way – with actual diagnosis, in-house repair, and no shortcut part swapping.
How to prevent corrosion from coming back
After repair, the board needs to be fully dry, electrically stable, and protected from the original cause. That may mean replacing leaking batteries, reseating seals, fixing cooling issues that cause condensation, cleaning fan systems, or changing how the device is stored and used.
For some boards, conformal coating or localized protection makes sense after repair. For others, especially boards that run hot or need future service access, clean restoration and environmental control are the better path. It depends on the equipment, the type of damage, and whether the device lives on a desk, in a backpack, in a shop, or on the road.
The main thing is this: corrosion is never just cosmetic. If you catch it early, a board can often be saved. If you wait until traces vanish and power rails collapse, the repair gets harder, slower, and more expensive. Clean carefully, test thoroughly, and when the damage goes past surface level, let a real board repair technician finish the job properly.