Computer Repair - Game Console Repair - Electronics Repair - Micro Soldering

Categories
Uncategorized

Is Component Level Repair Worth It?

A laptop comes in dead after a charging port failure. A game console powers on but shows no video. A DJ controller works fine except for one damaged channel. In all three cases, the big question is the same: is component level repair worth it, or are you better off replacing the whole board or the whole device?

The honest answer is that it depends on the device, the failure, and the quality of the shop doing the work. But for a lot of electronics, especially expensive or hard-to-replace gear, component-level repair can be the smartest move by a wide margin.

What component-level repair actually means

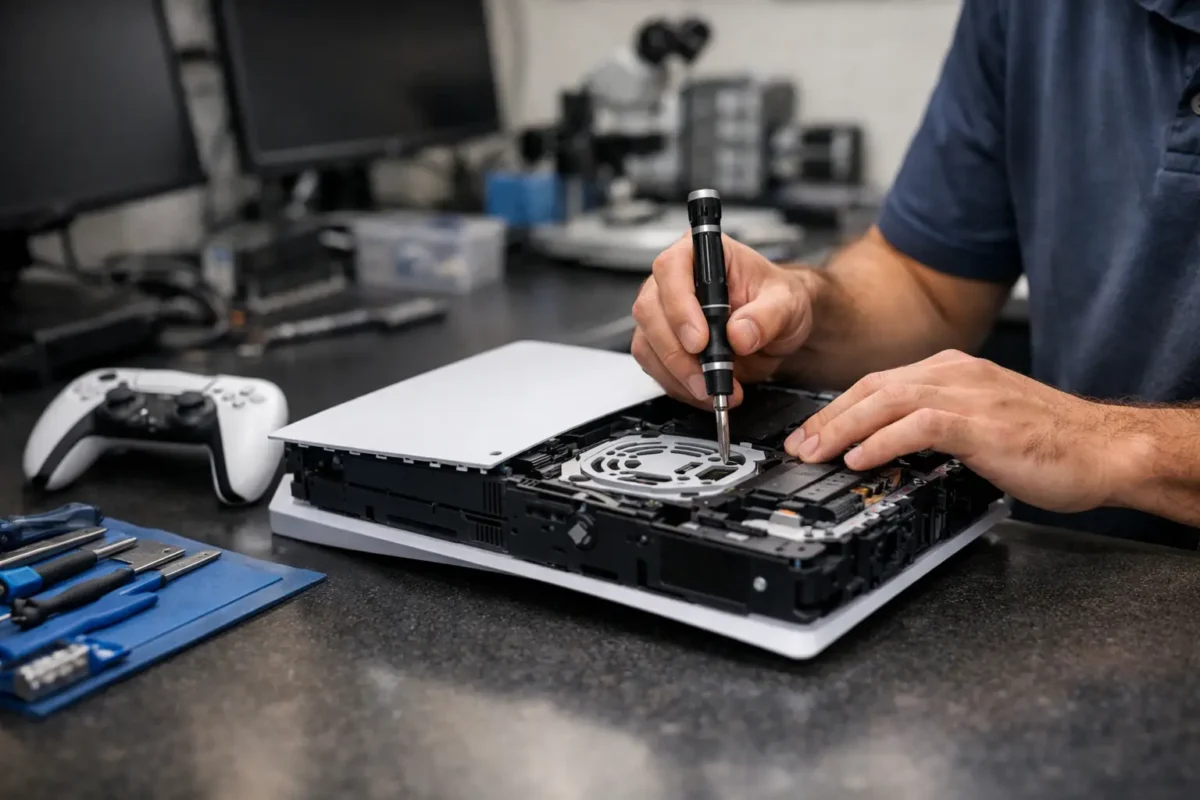
Component-level repair is exactly what it sounds like. Instead of swapping an entire board, a technician diagnoses the failed parts on that board and repairs the problem directly. That might mean replacing a burned capacitor, a failed MOSFET, a damaged HDMI encoder, a shorted charging circuit, a lifted pad, or a broken trace.

This is different from the approach many shops take. Board swap repair is faster when parts are available, but it is also blunt. If one small section fails, replacing the entire board may fix it, but it can also cost far more than necessary. On some devices, replacement boards are expensive, unavailable, or carry their own hidden problems.

True board repair takes more skill. It requires testing, reading schematics when available, tracing power rails, checking for shorts, and doing precise soldering work without causing new damage. That is why the value of component-level repair depends heavily on who is doing it.

Is component level repair worth it for most devices?

For many customers, yes – especially when the device is valuable, specialized, or no longer easy to replace.

If you own a gaming laptop, MacBook, custom PC motherboard, current-gen console, or professional DJ equipment, the replacement cost can be steep. In those cases, repairing the exact failed section often costs less than replacing a whole mainboard, and a lot less than replacing the entire device.

It also matters when the hardware has value beyond its price tag. Maybe your laptop contains critical business data. Maybe your console has been impossible to replace at a fair price. Maybe your mixer or controller is part of your paid setup and downtime is costing you work. A repair that restores function without forcing a full replacement is often worth it even before you compare parts pricing.

That said, not every board problem should be repaired. If the board has severe liquid damage across multiple circuits, heavy corrosion, prior botched repair attempts, or catastrophic multilayer PCB damage, the labor involved can outweigh the value of the device. A good shop should tell you that plainly.

When component-level repair makes the most sense

The strongest case for board repair usually comes down to economics and availability.

A common example is a laptop with a charging issue. If the actual failure is a small charging IC or a few shorted components near the power input, replacing the entire motherboard would be overkill. The same logic applies to HDMI failures on consoles, damaged USB-C circuits, blown backlight circuits, and many no-power conditions.

It also makes sense when replacement boards are either unavailable or unreliable. On some devices, donor boards are harvested from used equipment with unknown history. You may end up paying for a replacement board that has its own defects, mismatched revisions, or hidden wear. Repairing the original board can be the better long-term move because it preserves the device you already know.

Specialized equipment is another clear case. Pro audio and DJ gear often has limited parts supply, high replacement cost, and a long useful life when repaired properly. If one failed component is taking down an otherwise solid unit, board-level work is often the only practical option.

When replacement is the better call

There are times when replacement wins.

If the device is low-value and the repair is labor-intensive, the math may not work. Spending serious money to repair a bargain laptop motherboard rarely makes sense when a better replacement system is available for close to the same price.

Replacement may also be better when the damage is widespread. A surge event, heavy liquid intrusion, or board crack can affect multiple subsystems at once. Even if one fault is repaired, another damaged area may fail later. That does not mean repair is impossible, but it does change the risk profile.

Then there is the time factor. Some customers need the fastest possible turnaround. If a known-good replacement board is immediately available and priced reasonably, swapping it may be the faster path. The right answer is not always the most technically elegant one. It is the one that best fits the customer’s budget, timeline, and goals.

The hidden factor: diagnostic quality

This is where a lot of people get burned. The real question is not just whether component-level repair is worth it. It is whether the shop has the skill to diagnose accurately before touching the board.

Poor diagnostics create expensive mistakes. A shop may replace the wrong chip, miss a short on another rail, or declare a board unrepairable because they do not have the tools or training to go deeper. That makes board repair look risky when the real problem is weak process.

A competent repair team starts with symptom verification, inspection, power analysis, and targeted testing. They isolate the failure before quoting major work. They also know when to stop. Not every board should be forced through a repair if the likelihood of a stable result is low.

That is one reason many customers choose specialists over general electronics shops. At Amazing Technology Group, this kind of work matters because difficult repairs are handled in-house instead of being treated like a guess-and-check parts swap.

Cost, reliability, and long-term value

Customers usually focus on repair price first, which is fair. But value is bigger than the initial invoice.

A successful component-level repair can deliver strong long-term value because you are fixing the actual failed area rather than replacing large assemblies unnecessarily. That often means lower cost, less waste, and preservation of original hardware.

Reliability depends on the nature of the repair. Replacing a failed charging IC and restoring damaged pads can be a solid, lasting repair when done correctly. Rebuilding a heavily corroded liquid-damaged board with multiple compromised zones is less predictable. Both may be possible, but they are not equal in risk.

This is where honest communication matters. A good technician explains whether the failure appears isolated or whether it may be part of a larger pattern. Customers do better when they understand not just the price, but the likely outcome.

Is component level repair worth it for gaming systems, laptops, and pro gear?

For gaming systems, often yes. Console HDMI failures, power issues, and damaged ports are classic examples where a board-level fix can save a system that would otherwise be replaced. If the storage is tied to the board or the console is difficult to source, repair becomes even more attractive.

For laptops and desktops, it depends on the machine. Higher-end systems, custom builds, and business-critical computers are strong candidates because replacement cost is high and downtime matters. For very old or low-spec systems, replacement may be more practical.

For pro gear, board repair is frequently the best option available. Audio equipment, mixers, and controllers are expensive, specialized, and often worth keeping in service for years. If a failed component is the only thing standing between dead gear and a working rig, repairing at the board level makes a lot of sense.

What to ask before approving the repair

Before you authorize the work, ask how the fault was diagnosed, whether the issue appears isolated, and what the realistic success rate looks like. Ask whether the quoted repair is based on confirmed testing or just a common-failure guess.

You should also ask what happens if the board has additional damage once repair begins. That does not mean the shop is being evasive. It means electronics can reveal more once the first fault is cleared, especially after liquid damage or electrical surge events.

A professional shop will not promise miracles. They will give you a clear process, set expectations, and tell you when replacement is the smarter move.

Component-level repair is worth it when it solves a specific failure on hardware that still deserves to be in service. It is not magic, and it is not the right answer every time. But when the diagnosis is solid and the work is done by people who know board repair at a real engineering level, it can save money, preserve important equipment, and keep good hardware out of the scrap pile. If your device has real value, the smartest next step is not guessing – it is getting it properly diagnosed.

Categories
Uncategorized

Controller Stick Drift Repair That Lasts

One day your aim starts pulling left on its own. The next day your character is walking into a wall while your hands are off the controller. Controller stick drift repair becomes urgent fast, especially when the problem goes from occasional annoyance to constant input errors that make games harder to play and harder to enjoy.

Stick drift sounds simple, but the failure behind it is not always the same. Sometimes the analog module is worn out. Sometimes contamination has worked its way into the joystick assembly. Sometimes the issue is on the board itself, with damaged solder joints, liquid exposure, or circuit faults affecting how the controller reads movement. That difference matters, because a real repair starts with diagnosis, not guessing.

What causes stick drift in the first place?

Most modern controllers use compact analog stick modules with moving parts and internal sensors that measure position. Over time, those parts wear. The controller starts reading movement even when the stick is centered. That is the classic drift problem, and it becomes more common as a controller racks up hours of use.

Wear is only part of the story. Dust, skin oils, drink residue, and general contamination can interfere with smooth electrical readings inside the module. A controller that lives on a desk next to snacks and energy drinks sees a very different life than one kept clean and stored properly. Heavy play, hard clicks, and aggressive stick movement can speed up failure too.

Then there are the less obvious cases. We see controllers with impact damage after being dropped, broken stick caps that stress the module underneath, and board-level issues that look like drift but are actually signal problems. If someone replaces a joystick module without checking the board, they can waste time and money and still end up with the same symptoms.

Controller stick drift repair is not one-size-fits-all

A lot of online advice makes it sound like every drifting controller needs the same fix. Real life is messier than that. A temporary cleaning may help in mild cases, but it will not reverse physical wear inside a failing module. Recalibration can improve performance on some platforms, but calibration cannot fix damaged components. Replacing the entire controller works, but it is often the most expensive answer to a problem that may be repairable.

That is why proper controller stick drift repair should begin with inspection and testing. The goal is to confirm whether the issue is mechanical wear, contamination, solder failure, trace damage, power regulation trouble, or something else entirely. A shop that handles board-level electronics is better equipped to sort that out than a shop that only swaps parts.

When a DIY fix makes sense

If the drift is mild and the controller has not suffered physical damage or liquid exposure, basic DIY steps may be worth trying. Cleaning around the stick with the controller powered off can sometimes remove debris near the moving assembly. Recalibration through the console or system settings may also reduce minor input irregularities. In some cases, updating firmware helps if the controller has a communication or sensitivity issue rather than true drift.

The trade-off is simple. These steps are low cost, but they are also limited. If the internal potentiometers are worn or the soldered module is failing, no amount of surface cleaning will make the repair last. DIY disassembly is where risk goes up. Modern controllers are easy to damage if you force clips, tear ribbon cables, overheat pads, or install low-quality replacement parts.

For someone comfortable working on electronics, a joystick module replacement can be done at home with the right tools and experience. But this is not a battery swap. It usually requires controlled heat, proper solder removal, clean pad prep, accurate alignment, and post-repair testing. If the board is already compromised, the job gets harder fast.

When professional controller stick drift repair is the better move

If your controller is valuable, newer, or already showing signs beyond simple drift, professional repair usually makes more sense. That includes controllers with inconsistent behavior, charging problems, connection issues, liquid exposure, broken buttons, or physical damage around the stick area. Those symptoms can point to broader board trouble.

A professional repair shop should be able to test the controller, isolate the fault, and explain what is actually wrong before work begins. That matters because not every drifting controller needs the same level of repair. One may need a deep internal cleaning and recalibration. Another may need a full analog module replacement. Another may need trace repair or micro-soldering work after a failed prior repair attempt.

This is where technical depth matters. Shops that keep repairs in-house and work at the component level can often save hardware that other places write off. That is especially useful when replacement controllers are expensive, hard to match, or paired with custom setups.

What the repair process should look like

Good repair work is not just about swapping parts. It should follow a clear process. First comes symptom verification. The technician confirms the drift and checks whether the problem affects one axis, both axes, or appears alongside other faults. Then comes disassembly and internal inspection for contamination, wear, liquid damage, cracked joints, or damaged board areas.

If the analog module is the problem, the old component is removed carefully and the board is checked for pad condition and structural integrity. A quality replacement module is installed, soldered correctly, and tested for proper centering and movement response. If the board has damage, the repair may involve restoring solder pads, repairing traces, or addressing nearby components that affect signal readings.

After the hardware work is complete, the controller should be tested under real input conditions. That means checking centering, full-range movement, dead zone behavior, button response, charging if applicable, and wireless or wired communication. A controller is not repaired just because a new part is installed. It is repaired when it performs correctly.

How long will the fix last?

That depends on the root cause, the replacement parts used, and how the controller is treated afterward. If the repair addresses the actual failure and the work is done cleanly, a stick repair can restore a controller to solid everyday use. If someone uses cheap parts or rushes the soldering work, the controller may fail again sooner than expected.

Usage matters too. Competitive players and heavy daily users put far more stress on analog sticks than occasional weekend players. No stick module lasts forever. The goal is not magic. The goal is a correct repair with dependable results and no shortcuts.

It also helps to be realistic about age and condition. A newer premium controller with one failing stick is often a strong repair candidate. An older controller with drift, battery issues, charging trouble, and worn buttons may still be repairable, but the value depends on overall condition and replacement cost.

Is repair cheaper than replacement?

Often, yes, but not always. If the issue is limited to stick drift and the controller is otherwise healthy, repair is frequently the better value. That is especially true for premium controllers or hard-to-find models. If the controller has multiple failures or severe board damage, the economics can shift.

What customers usually want is a straight answer. Is this worth fixing, and will the fix hold up? A good repair shop should be able to give a realistic recommendation based on the controller’s condition, not push a repair that does not make financial sense.

For customers in Riverside County dealing with repeated drift or failed DIY attempts, working with a repair team that handles electronics at the board level can save a lot of frustration. Amazing Technology Group approaches these problems the right way – diagnose first, repair what actually failed, and keep the work in-house whenever possible.

How to reduce drift after repair

You cannot eliminate wear completely, but you can slow it down. Keep the controller clean, store it away from dust, and avoid eating or drinking over it. Do not force the sticks or toss the controller onto a couch, desk, or floor. Small impacts add up.

If drift starts mildly, do not ignore it for months. Early service can prevent added wear or collateral damage from repeated stress. The longer a failing component is used, the more likely the problem spreads from a simple module issue into a more involved repair.

A controller should do exactly what your hands tell it to do, nothing more and nothing less. When it stops doing that, the best next step is not guesswork. It is getting the problem diagnosed properly so the repair solves the actual fault and gets you back to playing without fighting your own hardware.

Categories
Uncategorized

Xbox Not Turning On Repair: What to Check

When an Xbox suddenly goes dead – no light, no startup chime, no response from the power button – most people assume the console is finished. In reality, xbox not turning on repair often comes down to identifying whether the fault is external power, a failed internal component, or a board-level issue that needs real diagnostic work instead of guesswork.

What causes an Xbox to stop powering on?

A no-power Xbox can fail in a few different ways, and the details matter. Some consoles show absolutely no signs of life. Others beep once, flash briefly, or turn on and shut right back off. Those symptoms point to different failure paths, which is why proper diagnosis matters more than replacing random parts.

The simplest cause is power delivery. That can mean a bad outlet, damaged power cable, worn power supply, or a power protection event after a surge. On some Xbox models, the external power brick is the weak point. On others, the issue is inside the console itself, such as a shorted component, failed power management circuit, damaged HDMI retimer, or a fault in the standby voltage rail.

Heat and dust can also play a role, but not always in the way people think. Overheating usually causes shutdown behavior before total no-power failure. If the console worked poorly for weeks, ran hot, and then stopped turning on, contamination or thermal stress may have contributed to a deeper board problem.

Xbox not turning on repair starts with symptom-based diagnosis

A good repair process does not begin with opening the console and ordering parts. It starts with isolating the symptom.

If the Xbox has no light and no sound at all, the first question is whether standby power is reaching the board. If the console beeps but does not boot, the problem may be farther along in the startup chain. If it powers on for one second and dies, that often suggests a short, failed regulator, or protection shutdown.

This is where many shops go wrong. They treat all no-power failures as the same issue. Real console repair means checking voltage rails, testing for shorts, examining MOSFETs and regulators, and confirming whether the failure is in the power supply stage, southbridge-related circuitry, storage path, or another section of the board.

That difference matters for cost too. A shop that only swaps assemblies may quote a full board replacement or tell you the unit is not worth fixing. A technician who performs board-level diagnosis may be able to repair the exact failed circuit and save the console.

What you can safely check before seeking repair

Before assuming the console needs bench work, there are a few things worth testing. These steps are safe and practical for most owners.

Start with the outlet and cable. Try a known-good outlet directly at the wall, not through a power strip or surge protector. If your model uses an external power brick, check whether the brick shows any light or unusual behavior. A dead or blinking brick can indicate either a failed adapter or a console-side short.

Next, disconnect everything from the Xbox except power. Remove external drives, USB accessories, headset adapters, and network accessories. A bad peripheral can interfere with startup, especially if there is a short on a USB line.

Then perform a full power reset. Unplug the console completely and leave it disconnected for several minutes. If the model has a power brick, disconnect both ends. This will not fix a failed chip, but it can clear certain power-state lockups.

Also pay attention to what happens when you press power. No response, a brief sound, a flash of light, or immediate shutdown are all useful clues. Those details help a technician narrow the fault much faster.

What not to do during xbox not turning on repair

A lot of damage happens after the original failure, not before it.

Do not keep trying to power on a console dozens of times if it is clicking off or showing signs of a short. Repeated attempts can stress already failing components. Do not swap in random parts because someone online had a similar symptom on a different model. Xbox One, One S, One X, Series S, and Series X have different common failures and different board layouts.

Avoid using compressed air aggressively through vents on a dead console. That can push debris deeper inside. And unless you have proper tools and electronics experience, avoid opening the system and probing the board. Modern consoles are tightly packed, and damage to connectors, shielding, or surface-mount components can turn a repairable problem into a more expensive one.

Common internal faults behind no-power Xbox failures

Power supply and input stage problems

On consoles with external power supplies, the adapter is an obvious suspect, but it is not always the real cause. If the console has an internal short on the main power rail, it can make the external brick appear defective. On newer models with internal power supply sections, failures can occur at the input filtering stage, protection components, or power conversion circuits.

Shorted components on the motherboard

Shorted capacitors, failed MOSFETs, and damaged regulators are common board-level faults in no-power electronics. These parts can fail from age, heat, liquid exposure, electrical surge, or manufacturing fatigue. A short on one rail can stop the entire system from entering a normal startup sequence.

HDMI and related circuit faults

This surprises people, but some HDMI circuit failures can affect startup behavior. Depending on the model and the exact component involved, the console may fail to initialize correctly or shut down during boot. That is why a proper diagnosis checks more than just the obvious power path.

Corrosion or liquid damage

Even a small spill can create long-term trouble. Corrosion around connectors, power management chips, or fine-pitch components can interrupt signals or create partial shorts. Sometimes the console works for weeks after exposure before finally failing.

Storage or firmware-related issues

Not every power complaint is true no-power. Some consoles appear dead to the owner because they never complete startup or display video. A failing drive, corrupted system files, or internal communication fault can imitate a deeper hardware problem. The symptoms can overlap, so testing matters.

When professional repair makes sense

If you have already ruled out the outlet, cable, and accessories, and the Xbox still shows no life or unstable startup behavior, it is time for professional service. This is especially true if the console powers on briefly and shuts off, the power supply acts abnormal, or there are signs of heat, odor, prior liquid contact, or surge damage.

Professional repair makes the most sense when the console still has value to you – whether that is cost, saved data, game library access, or simply not wanting to replace hard-to-find hardware. It also makes sense when the shop actually performs in-house diagnostics rather than shipping the job elsewhere or defaulting to board replacement.

A real repair workflow should be straightforward. The unit is checked in, symptoms are verified, diagnostic testing is performed, the failed area is identified, and repair options are explained before work moves forward. That approach is better for the customer because it keeps the process honest. You are paying for diagnosis and skilled repair, not guesswork.

Why board-level repair matters on Xbox consoles

Board-level repair is the difference between solving the fault and replacing assemblies until something works. On a no-power Xbox, that can mean tracing a failed voltage rail, replacing a shorted component, rebuilding damaged pads, repairing connector damage, or restoring a section of the PCB after corrosion.

That level of work is not available everywhere. Many repair businesses are built for quick part swaps, which is fine for simple jobs but not enough for complex console failures. If the issue sits on the motherboard, shallow troubleshooting will miss it.

For customers, the benefit is practical. Component-level repair can reduce cost, preserve the original console, and recover systems that other shops reject. That is especially valuable for newer Xbox models and for failures that are intermittent, surge-related, or tied to power management circuitry.

Choosing the right repair shop

Not every repair shop is equipped for xbox not turning on repair, even if they advertise console service. Ask whether diagnosis is done in-house. Ask whether they perform board repair, micro-soldering, and power circuit work. Ask whether they can explain the failure before quoting the fix.

A good shop will not promise a magic answer in two minutes. They will tell you what needs to be tested, what the likely causes are, and where the uncertainty is. That kind of transparency is a good sign, because electronics repair is technical work, not a script.

If you are in Riverside County, working with a shop that handles advanced console repair in-house can save time and avoid the usual runaround. That matters when you need a real answer, not a blanket recommendation to replace the whole unit.

An Xbox that will not turn on is not automatically done for. Sometimes the problem is simple. Sometimes it is deep on the board. Either way, the best next step is not guesswork – it is a proper diagnosis that finds the actual fault and gives you a repair path you can trust.