Corrosion on a motherboard usually starts small – a little green or white buildup near a connector, battery terminal, charging area, or liquid-damaged component. Then the weird behavior starts. A laptop stops charging. A console powers on and shuts right back off. A PC posts once, then never again. If you are trying to learn how to fix motherboard corrosion, the first thing to understand is simple: cleaning the board is only part of the job. The real repair is finding out what the corrosion already damaged.
What motherboard corrosion actually does
Corrosion is not just dirt sitting on the surface. It is a chemical reaction that attacks metal. On a motherboard, that can mean eaten traces, weakened solder joints, damaged component legs, contaminated connectors, and short circuits between points that should never touch.
That is why two boards with similar-looking corrosion can need very different repairs. One may come back with careful cleaning and drying. Another may need micro-soldering, jumper wire trace repair, connector replacement, or component-level diagnostics to restore power rails and data lines.
Liquid type matters too. Clean water is bad enough, but sugary drinks, salt exposure, leaking batteries, flux residue, and high humidity can all leave behind conductive or corrosive contamination. The longer it sits, the worse the damage tends to get.
Before you fix motherboard corrosion, stop and assess
If the board is still installed in a device, disconnect all power first. Remove the battery on a laptop if possible. Unplug CMOS batteries, main batteries, power adapters, and anything else feeding voltage into the board. Trying to test a wet or corroded board under power is one of the fastest ways to turn a repairable issue into a dead board.
Next, inspect the full affected area under bright light. You are looking for white residue, green or blue deposits, blackened pads, rusted shields, damaged pins, lifted solder mask, or missing copper. Check both sides of the board if you can. Corrosion often spreads farther than people expect, especially around connectors and under chips.
At this point, decide whether you are dealing with surface contamination or likely structural damage. If corrosion is only light and accessible, careful cleaning may be reasonable. If you see burned areas, missing pads, heavily eaten pins, battery leakage, or corrosion under BGA chips or fine-pitch ICs, the board is already in professional repair territory.
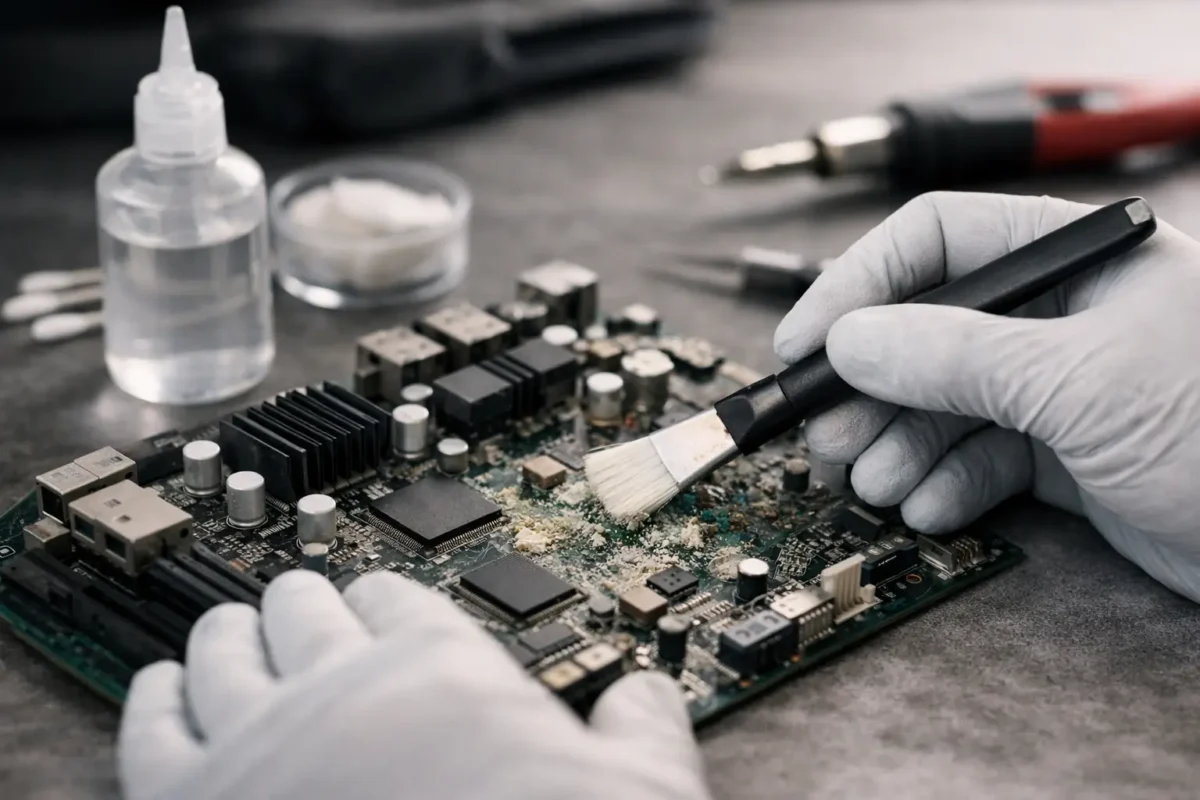
How to fix motherboard corrosion without making it worse
The safest cleaning approach is controlled, deliberate, and gentle. This is not the time for paper towels, tap water, compressed shop air, or random household cleaners.
Tools that make sense
Use high-purity isopropyl alcohol, ESD-safe brushes, lint-free swabs, magnification if available, and patience. For heavier residue, ultrasonic cleaning can help, but only when done correctly and with proper drying afterward. On some assemblies, aggressive cleaning can force contamination deeper under components instead of removing it.
If you are cleaning a PC motherboard, laptop logic board, console mainboard, or DJ equipment PCB, remove loose debris first. Then apply isopropyl alcohol to the affected area and gently work the corrosion with a soft ESD-safe brush. The goal is to dissolve and lift contamination, not scrape copper off the board.
What not to do
Do not use vinegar as a general motherboard cleaner. People mention it because mild acids can neutralize some alkaline battery leakage, but used casually it can create more residue and more work. Do not use WD-40, glass cleaner, or canned air held upside down. Do not attack the board with metal picks unless you are prepared to repair lifted pads and broken traces.
And do not assume the job is done because the board looks cleaner. Appearance is not function.
Drying and post-clean inspection matter as much as cleaning
After cleaning, the board needs to dry fully before any testing. Alcohol evaporates quickly, but trapped moisture under chips, shields, connectors, or socketed parts can remain longer than expected. Rushing this step leads to bad readings and sometimes fresh shorts.
Once dry, inspect again under magnification. This is when hidden damage usually becomes obvious. You may find corroded via barrels, darkened solder joints, cracked component legs, or traces that looked intact until the residue came off. A clean board can still be an electrically damaged board.
Signs the corrosion already caused deeper failure
If pads are missing, traces are black or broken, connector pins are pitted, or component leads crumble under light touch, cleaning will not be enough. The same is true if power rails measure shorted, if the device pulls abnormal current, or if key circuits like charging, USB, HDMI, audio, or backlight stop working after cleanup.
That is where real board-level repair starts. The work may involve replacing corroded components, rebuilding pads, running micro-jumpers, reflowing or replacing connectors, and confirming the damaged section no longer leaks current or drops signal integrity.
How to test a motherboard after corrosion cleanup
If you know your way around electronics, testing should start with basic checks before full power-up. Measure for obvious shorts to ground on major rails. Check fuse continuity where relevant. Inspect nearby coils, MOSFETs, charging circuits, and connector pins in the affected area. On laptops and consoles especially, corrosion near the power input or battery management section can create chain-reaction faults.
For less technical users, this is the point where trying to “just turn it on and see” becomes risky. Powering a partially damaged board can burn components that were still salvageable. It can also wipe out valuable data on storage devices if the fault extends beyond the motherboard.
If the board passes visual inspection and no obvious shorts are found, power testing should still be controlled. A bench power supply with current limiting is far safer than plugging the device straight into its normal adapter. This lets a technician see whether the board is drawing normally or hitting a fault condition immediately.
When DIY works and when it does not
There are cases where DIY cleaning is enough. Light residue from minor exposure, no visible trace damage, no corrosion under major chips, and no symptoms beyond inconsistent connection can sometimes be resolved with proper cleaning and full drying.
But there is a hard limit. If your device is valuable, hard to replace, or already showing no-power, no-display, charging failure, random shutdowns, missing peripherals, or overheating, guessing your way through the repair usually costs more in the end. Corrosion damage is often layered. The visible contamination is one problem. The hidden electrical damage is another.
That is why advanced shops handle this differently than part-swappers. They do not stop at “we cleaned it.” They trace the fault path, verify affected circuits, and repair the board in-house when possible. That matters on gaming PCs, MacBooks, business laptops, PS5 and Xbox consoles, and pro audio gear where replacement boards are expensive, unavailable, or tied to configuration and data.
How to prevent motherboard corrosion from coming back
Prevention is less glamorous than repair, but it saves hardware. Keep devices away from drinks and high-humidity storage. Replace leaking CMOS or internal batteries early. Clean liquid spills immediately and properly. Do not leave a device powered after exposure. If a machine was in a garage, warehouse, club setup, or coastal environment, periodic internal inspection can catch early buildup before it turns into board damage.
It also helps to deal with symptoms early. A flaky USB port, intermittent charging issue, or random boot failure after a spill is not something to watch for six months. Corrosion never gets better with time. It spreads, weakens metal, and turns a small board repair into a full replacement scenario.
The practical bottom line on how to fix motherboard corrosion
If you want the honest answer to how to fix motherboard corrosion, here it is: remove power, inspect carefully, clean only with the right materials, dry thoroughly, and then verify what the corrosion actually damaged. Sometimes that ends with a cleaned board. A lot of times, it ends with component-level repair.
That is not bad news. It just means the right fix is based on diagnosis, not guesswork. At Amazing Technology Group, this is exactly the kind of failure that rewards real board work over shortcuts. If your board matters, treat corrosion like an electrical problem, not just a cleaning problem.
The sooner you catch it, the better your odds of saving the device and avoiding a much bigger repair.